![fieldconnect-logo-1000x118-light-bg.png]](https://knowledge.fieldconnect.com/hs-fs/hubfs/fieldconnect-logo-1000x118-light-bg.png?height=25&name=fieldconnect-logo-1000x118-light-bg.png)
Creating Forms
Form definitions are created in HTML. Each input field defined in the form is extracted and saved by the Forms Engine. The HTML must be well formed and follow the rules of the W3C - DTD XHTML 1.0 STRICT definition.
Invalid Tags
- There can be no <form> tags between the html <body>
- There can be no post-back type tags: <input type="submit">, <input type="button"> or <button>
- There can be no file upload tags: <input type="file">
Identification
- All form elements must have a unique id and name attribute. The id and name MUST be the same.
Example:
<input id="ModelNum1" name="ModelNum1" type="text" />
- It is strongly suggested that meaningful id names be used. For example “ModelName” is preferred over something like “mn”.
Radio Button Inputs
- Special care must be taken for inputs of type “radio”.
- The id MUST equal the value
- One button in the group must be checked.
Example:
<input type="radio" id="male" name="sex" value="male" /> Male
<input type="radio" id="female" name="sex" value="female" checked="checked" /> Female
CSS
- Any CSS found in the <head> section of the HTML form document will be saved along with the body and used when the form is displayed.
- The CSS identifier tags must be in the correct format:
<style type="text/css"> … </style>
Validation
- The Forms Engine has several built in validation functions. Each is defined using a proprietary attribute in the form element tag (fcvalidate) along with the validation method. In the example below “isNumeric” is the method with a parameter of the form element id enclosed in single quotes (‘PartQty1’). Validation methods are run when the form is saved.
fcvalidate="isNumeric('PartQty1')"
Example form element with validation:
<input id="PartQty1" name="PartQty1" type="text" fcvalidate="isNumeric('PartQty1')" />
- In addition to validation when the form is saved, the validation methods can be run when the data in the form element changes. This type of validation only makes sense for text input types. To add the change validation use the following attribute:
onchange="validateElement('PartQty1')"
Example form element with full validation:
<input id="PartQty1" name="PartQty1" type="text" onchange="validateElement('PartQty1')" fcvalidate="isNumeric('PartQty1')" />
- Available validation methods:
- notEmpty(‘id’) – value cannot be empty
- isNumeric(‘id’) – value must be numeric OR empty
- isValidDate(‘id’) – is the value a valid date OR empty
- notEmpty_isNumeric(‘id’) – must be numeric and NOT empty
- notEmpty_isValidDate(‘id’) – must be a valid date and NOT empty
Templates
All forms are displayed in a pre-defined template. Only the body portion and any CSS defined in the form is used in the FieldAccess web page. The template has a header with pre-filled elements from the Work Order. In addition, it may have footer where attachments can be added if attachments are enabled.
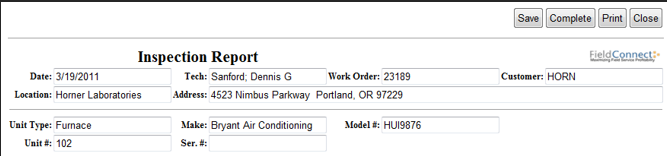
As of this version there are three templates available.
- Blank – No header information or Logo is displayed. This is used for a Customer’s form. The logo would be in the body of the form.
- Basic – basic Work Order fields.
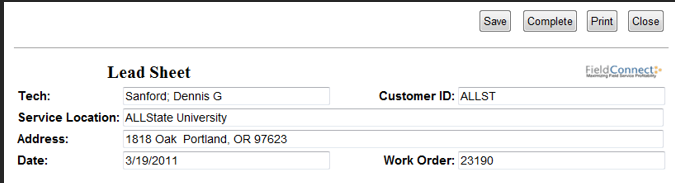
- Equipment – for equipment related forms.
Administration
The forms administration page is accessed from the FCAdministration site, on the Forms tab.
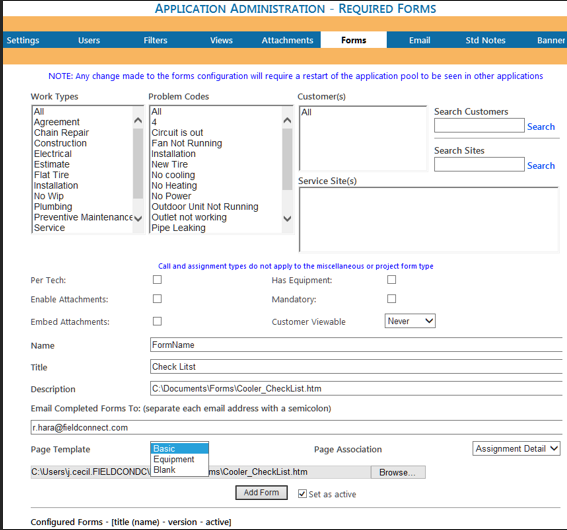
The Forms tab is used to define new forms and set the properties of the form that determine when and where it is displayed for user editing.
- Work Types and Problem Codes list – Select the type of Call and Problems that the form will be associated with.
- Customer(s) – Select the Customer or Customers that the form will be associated with.
- Service Sites – Select the location or service site for the customer selected, that the form will be associated with.
- Per Tech – Specify whether each tech assigned to the Work Order fills out a different form.
- Has Equipment – Specify whether or not the Work Order has equipment associated with it.
- Enable Attachments – Allow attachments for the form. Note: The FiedConnect Attachment engine must be configured.
- Mandatory – If checked then the Work Order cannot be closed until the form has been completed.
- Embed Attachments – When a form is emailed it is first converted to PDF. Checking this option will embed any attachments in the PDF.
- Name – A unique name for the form. This is not displayed on the form but must be unique as it helps identify the form definition.
- Title – The title that is shown on the form. This is also shown in FieldAccess for the Techs to select.
- Description – Optional information describing the form. Recommend putting the path to where the file is located.
- Page Template – The template to show the form in.
- Page Association – The FieldAccess page where access to the form will be shown:

- Browse – Used to upload the form from disc. It is strongly recommended that form definitions be kept within the FieldConnect\Forms folder on the web server.
- Add Form – Add the new definition.
- Configured Form – A list of currently configured forms. Use the Delete and UpdateMarkup buttons to manage forms that are already defined.